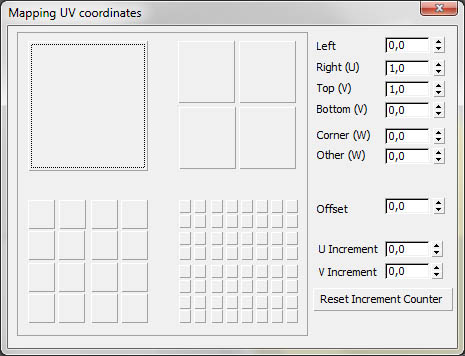
In this floater you can enter the
mapping coordinates for Poly mapping. On
the right side you can enter the left, right, top and bottom position,
to which it is mapped. Additionally, an offset can be added to these uv
coordinates. Especially
in connection with filtering and mipmapping in some realtime
engines there are some problems with this. If you've got a texture with
one dark and one light side, it may occur that there's a thin dark line
on the white side and a thin dark line on the light side in your
engine. One possible solution for this problem is to map the according
faces with a small offset of about 0.002 to 0.01; small enough not to
disturb the texture tiling, but big enough to suppress the thin lines.
With the Offset spin box you can set this offset for poly mapping.
On the left side there's a panel with schematic mapping coords (tiles) for conveniently setting common tile coordinates. You can click any of these schematic tiles to set the according mapping coordinates in the coordinate spinners on the right side.
On the left side there's a panel with schematic mapping coords (tiles) for conveniently setting common tile coordinates. You can click any of these schematic tiles to set the according mapping coordinates in the coordinate spinners on the right side.