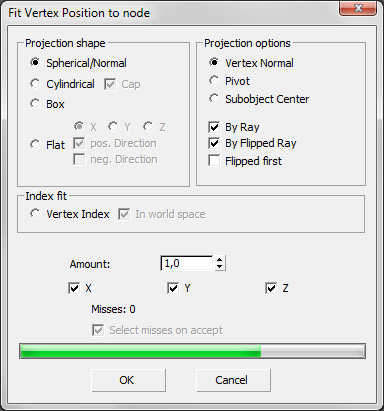
Here you can "fit" vertices onto the surface of another object.
When you click the "Fit" button, you at first have to select another object.
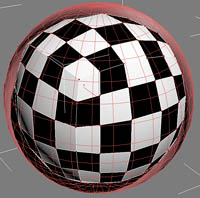
Then rays are casted through each selected vertex and it is checked, if they collide with the other object. If so, the vertex is moved to the collision point.
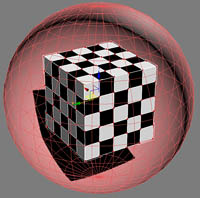
This is an easy way to give one object the shape of another.
Alternatively, you can use the vertex indices of the other object, but this only works good on objects with the same vertex number and order.
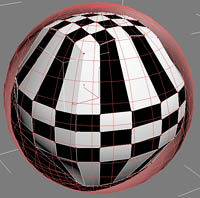
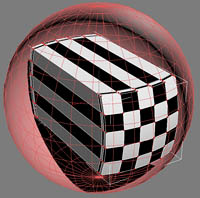
In the example here, we fit a cube into a globe.
- Group "Projection Shape":
- Spherical/Normal: The rays are casted in all directions, like a sphere.
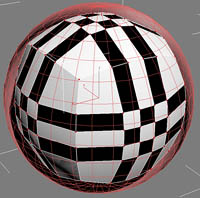
- Cylindrical: The rays are casted like a cylinder: only in x/y direction
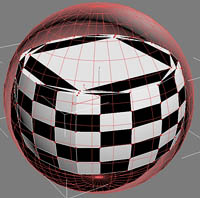
- Cap: If checked, the z direction is casted parallel to the z axis.
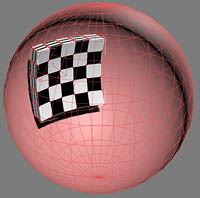
- Box: The rays are casted like a box: parallel along the x/y/z axis.
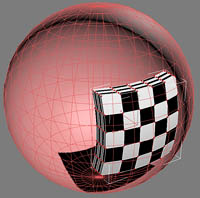
- Flat: The rays are casted parallel only along one direction: x, y or z.
- X: X direction only.
- Y: Y direction only.
- Z: Z direction only.
- Positive direction: The positive direction of the axis is used.
- Negative direction: The negative direction of the axis is used.
If both positive and negative directions are checked, the rays depend on the positive or negative position of the vertex.
- Group "Projection Options": In this group you can select, how the rays are casted and used.
- Vertex Normal: The vertex normal, determined by the surrounding faces' normals, is used. Explicit normals or smoothing groups are not supported.
- Pivot: A ray from the pivot through the vertex is casted.
- Subobject center: A ray from the selected subobjects center through the vertex is casted.
Note that in this example, it is identical to object center, because both are in the same position.
But this is useful, if you have e.g. a leg of a model, and want to fit it into a cylinder. Here you would use "Subobject center".
- By ray: the ray in direction of the faces front side is used
- By flipped ray: the flipped (opposite, inverse) ray is used
- Flipped first: When both the ray and the flipped ray are used, this switch tells the program to test the flipped ray first
- Group "Index Fit ": In this group you can select, if the vertex indices shall be used.
- Vertex Index: The vertices are set by the matching vertex index of the picked object. Note that this only makes sense for objects with exactly the same vertex order. All other objects will produce errors.
- In world space: The vertex position is copied from the world space position of the picked object. Otherwise, the object space is used.
- Amount: Sets the amount, by which the vertices' positions are set. 1 means complete influence, 0 zero influence.
- X, Y, Z: Here you can except one or more axes from the influence.
- Misses: Depending on the objects, not all rays may find their target. Here is displayed how many rays missed their target.
- Select Misses on accept: If there are misses, the vertices which caused these misses can be selected on accepting by "OK"